December 31, 2010

Pigs, cows and lettuce

This week, we returned from Nonna’s full, exhausted and ready to embrace vegetarianism for the next month. I think we ate our way through at least two pigs and an entire cow last week. It was delicious. Nonna sent me home with more of that special sausage, a piece of great grandma’s fruitcake (fruitcake that took us half a day to make and somehow didn’t make it to the table on Christmas...the best laid plans), and a beautiful chunk of salt pork.  But right now all Tom and I want to eat are vegetables.


My mother did her best to get green, leafy food into us. She cooked up some escarole and put it in our soup when she didn’t think we were looking, and everyday without fail she diligently dressed up a salad to serve with dinner. But you try convincing twenty hungry Italians that what they really want in between the raviolis, meatballs, braciole, spiedini, veal, stuffed mushrooms and cannolis, is salad. Her determination was admirable, her success rate, marginal at best. 

We give my poor mother such a hard time about her salads. The lady fusses more over mixed greens than most people do over a roast chicken. The final result is always well worth it, and maybe if we did eat a little more salad and a little less spiedini we wouldn’t need to resort to such drastic measures as vegetarianism… On second thought, less spiedini? NEVER.

But since we are back home and neither pig nor cow are anywhere to be seen, tonight we will kick 2010 out the door over a nice plate of salad.


Orange and Fennel Salad

This salad is not only scrumptious; it’s also very pretty. It has a lovely crunch from the fennel and a surprise of flavor from each and every one of those little pomegranate seeds. Don’t be afraid of chopping the pomegranate in half and deseeding the whole thing. Also, if you don’t share my obsession with all things fig, regular balsamic vinegar is completely fine.


1-2 hearts of Romaine lettuce, chopped
Half a bulb of fennel, thinly sliced
1 orange, thinly sliced into pinwheels
Pomegranate seeds (as many as you like)

Vinaigrette

Extra virgin olive oil, 6 TBLS
Fig balsamic vinegar, 1 tsp
Juice from half of an orange
Salt and pepper to taste

Assemble the lettuce, fennel, orange and pomegrante seeds.

Whisk together the olive oil, vinegar and juice. Add salt and pepper to taste.

Toss the vinaigrette with the salad, using as much or as little as you want.

December 17, 2010

Just as long as we have we

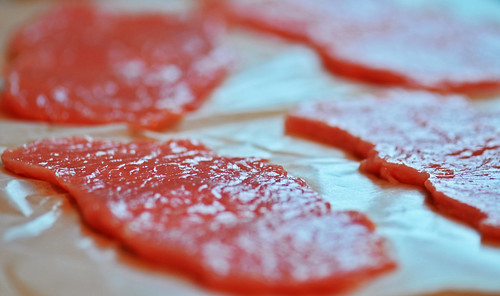
Welcome, Christmas, bring your cheer. We need it. It has been quite the roller coaster of a year and right now, what we need most, is to cram into Nonna’s tiny kitchen, listen to tacky Italian Christmas music and pound out some
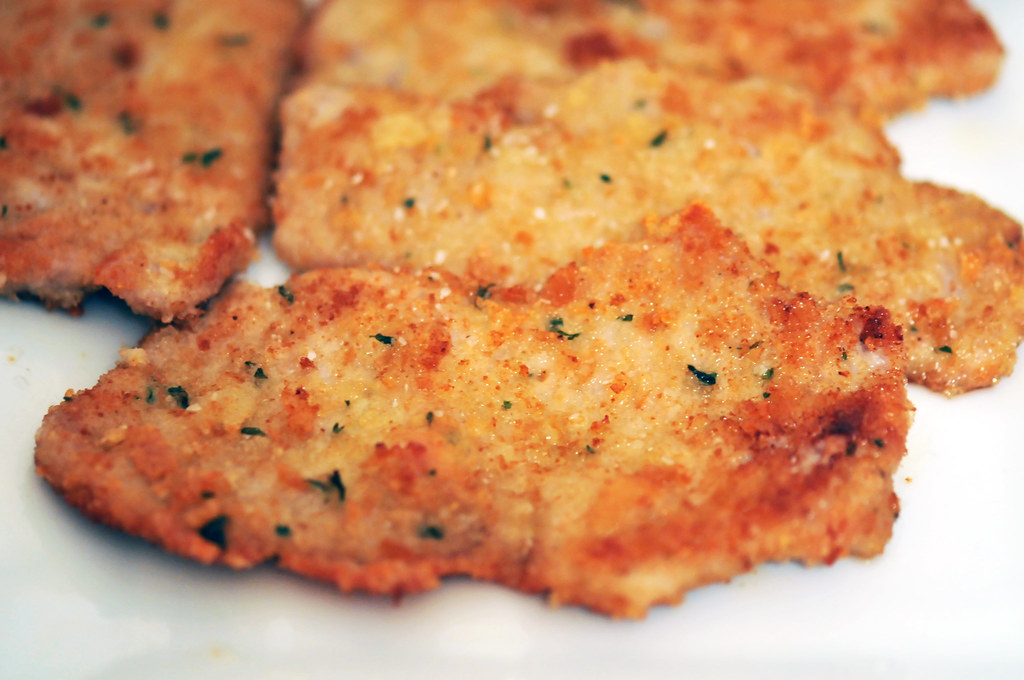
 spiedini and veal.

My family has so much to be thankful for. We have truly beautiful friends, we have our health and most importantly, we have each other.  Faced with loss and disappointment our foundation might shake a bit, but at the end of the day we are solid. It’s sad to think that some people don’t have this support. Perhaps sadder to realize that sometimes the reason they don’t is of their own doing. So I am reminded to be thankful, very thankful for all of the wonderful people that surround my family and me.

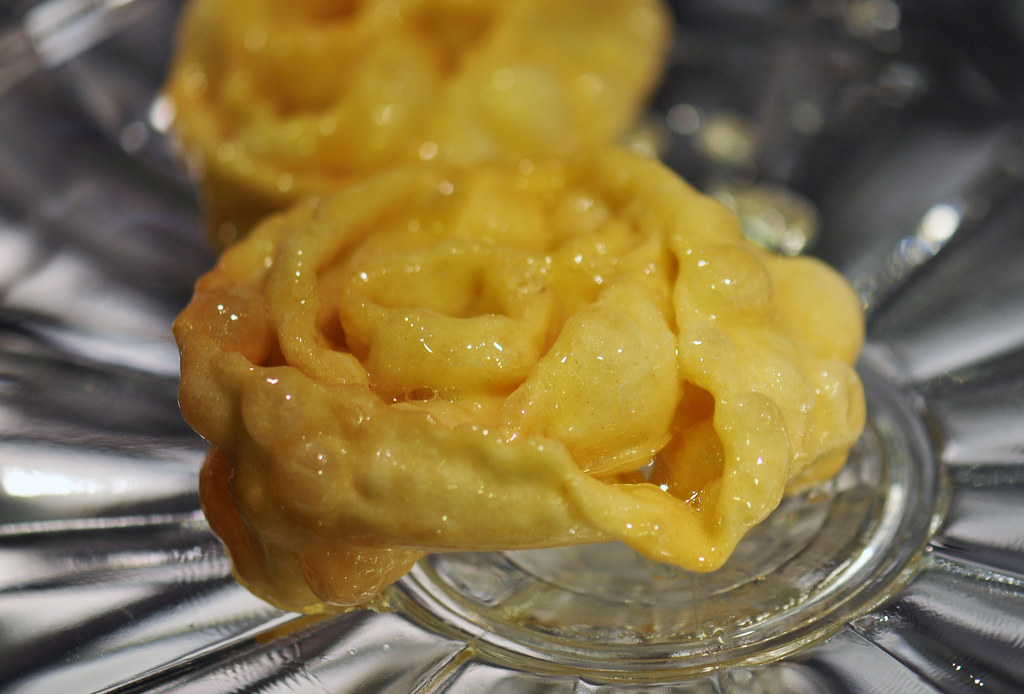
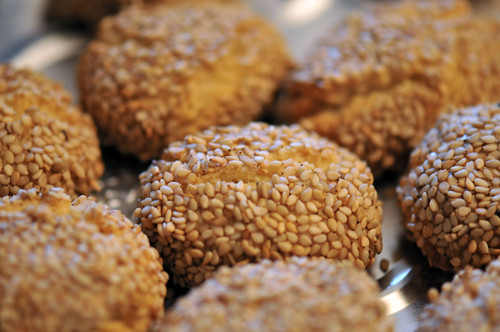
The recipe I want to share with you is very special to me. In Italian these cookies are called “Sfingel”, but to me they are simply Uncle Danny’s Honey Cookies. Delightfully intricate, they look almost like snowflakes, snowflakes that have been doused in warm, golden honey. They were my Uncle Danny’s favorite Christmas dessert.


Every year growing up I would watch Nonna putter around the kitchen a few days before Christmas mumbling, “I still have to make Uncle Danny’s Cookies”.  I would ask, “why are these Uncle Danny’s cookies?” and Nonna would say, “Because he’s the only one who eats them!” Now, I didn’t think it was quite fair that Uncle Danny got a whole plate of cookies all to himself, especially cookies covered in honey. So being all of eight years old, I remember making sure that he knew they were now my favorite cookie too. He was more than happy to share.

That was his nature- to share and to take care of those around him.  And to school you on the finer points of republican politics. Now, we’ve already established that I am very much a liberal so you might assume  that Uncle Danny and I didn’t get along.  And you would be so wrong.

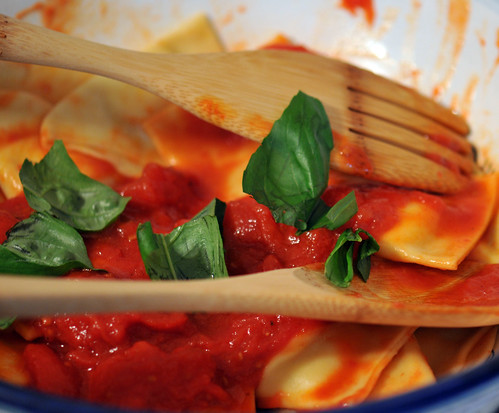
On Christmas afternoon, Uncle Danny would step into the room with a glass of wine, sit down next to me and ask, “So how’s your girl Hillary?” And we’d be off. Our conversations were one of my favorite parts of Christmas. He loved people who had different opinions (er, I’m still working on that) and my memories of the verbal sparring between he and his brother, my Uncle Angelo, were conversations screenplays are born from. They talked politics all the way through antipasto, took a break for dinner, and then would pick it up again for dessert. They were wise enough to realize that politics and pasta are never a good mix.

This will be our first Christmas without my Uncle Danny.  The table will surely feel a little bigger, and the room a little quieter but there will be two things of which I am certain. There will be no politics during pasta, and a big plate of Uncle Danny’s Honey Cookies will be prominently placed in the middle our table.


Now, I am not a religious person but I’m sure that Uncle Danny would have closed this with a prayer. I instead, will rely on Dr. Suess.

“Welcome, Christmas, bring your cheer. Cheer to all Whos far and near. Christmas Day is in our grasp so long as we have hands to clasp. Christmas Day will always be just as long as we have we. Welcome Christmas while we stand, heart to heart and hand in hand."


Uncle Danny’s Honey Cookies (Sfingel)


As delicious as these cookies are alongside a cannoli or two, they are even better for breakfast. Trust me on this. One more thing, these cookies are somewhat labor intensive. Especially when trying these for the first time, but don't get discouraged. Remember, it's the journey.

2 cups flour
¼ tsp salt
2 tsp baking powder
3 eggs
2 TBLS corn oil + enough for frying
1 tsp vanilla
1 egg white
1 large jar of honey
2 tsp of sugar

Special equipment
Pasta maker
KitchenAid

Deep fryer (not required)
Dough crimping wheel

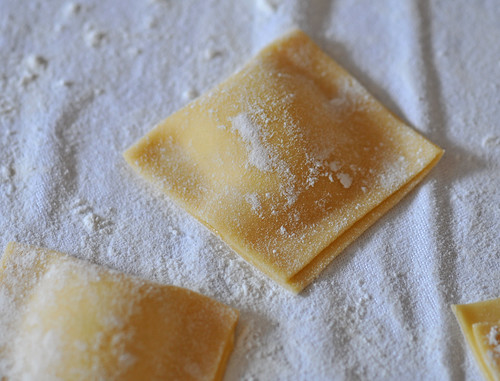
The first step of the honey cookie making process is much like making pasta dough.

Using the paddle on your KitchenAid, combine ingredients one through six and create dough.

Gather the dough with your hands and form a ball.

Divide the dough into rectangular blocks, a little smaller than the palm of your hand.

Turn on your pasta maker and put it on the widest setting. I use the KitchenAid pasta maker attachment, and the widest setting on that is 1, but yours may be numbered differently.

Run a piece of the dough through, and then gently refold it back to the rectangular block shape. Repeat this process four times. Then adjust the setting to level 2 and run the dough through. DO NOT fold the dough this time. Adjust to level three and repeat. Rest the finished dough on the table. Repeat the process the remaining dough.

Once all of the dough has been rolled out let it rest about 20 minutes. Then, using your dough-crimping wheel, cut strips about 8 inches long, and ½ inch wide.

Now for the fun part! Taking one strip, begin to roll it. The end result will look much like a fully bloomed rose, or for those of you who grew up in the 80’s, like the “Six Feet of Bubble Gum” that was rolled up to look almost like a snail. Using one finger as your “egg white finger” carefully dab the dough every ½ an inch or and press it together with the next layer of dough. Continue dabbing with egg whites as you finish rolling the strip. What your doing with the egg white is ensuring that the “rose” holds its shape during the frying process.

Let the rolled cookies sit out for about an hour.

Fill either a deep fryer or a pot about ¾ of the way up with corn oil. Once the oil is rippling, you’re ready to fry. Carefully, using a fork drop two or three cookies at a time into the oil. They will immediately puff up. They only take a minute or two to cook, so as soon as you see the color turn light gold, get them out of the oil and onto a paper towel.

At this point, the cookies can be stored or frozen until you are ready to serve.

You should dip them in honey the day you serve them. To do this, combine the honey and sugar in a small pot and heat until it begins to boil. Carefully dip each cookie in the sticky mixture, covering the cookie completely.

When you finally take your first bite do me a favor, think of my Uncle Danny.

November 30, 2010

A true patriot

It’s that time! With tinsel, turkey and Bing Crosby, the holidays have officially arrived. Tom and I are just now emerging from the food-induced coma that was Thanksgiving.


It may surprise you to know that my family enjoys a very traditional Thanksgiving dinner. We do the turkey, stuffing, sweet potatoes and countless vegetable sides. We set a festive table and have yet to miss Santa’s arrival while watching the Macy’s Day Parade.


I will admit that the turkey dinner is preceded by a very Italian antipasti spread including Genoa salami, imported prosciutto, provolone cheese, artichokes and peppers.


But really, when we feel like it, we can be as American as apple and pumpkin pie. Except for me. I don’t much care for pie and I have an especial aversion to that which is pumpkin. I like to think that this speaks to my contrary nature…my inner rebellion which let’s face it, is as American as it gets.  That’s me, a true patriot. A patriot who prefers Italian prune cake to pie. That’s right. Prune cake.


I can tell you just scoffed but don’t be too quick to judge. This richly spiced cake with a slight chewy texture captures all of the warmth of the season with just one bite. Eating it makes you feel like you’ve just watched Mr. Stewart in It’s a Wonderful Life.  If you take issue with a cake with “prune” in it’s name then perhaps think of it instead as Spice Cake. Or, you be thankful for your orange colored pies, and let me be thankful for my prune cake. Yum.

Prune Cake

This is my Great Grandma Tocco’s recipe and I’ve been told under no uncertain terms that it is not to be fooled with. It's best to make this the day before you intend on eating it- give the spices time to get to know each other.

Cake

2 ½ cups flour
1 tsp baking soda
¾ tsp baking powder
1 tsp ground cloves
1 tsp allspice
1 tsp cinnamon
½ cup Crisco, plus more for greasing
1 ½ cups sugar
2 large eggs
1 cup prunes, pitted and roughly chopped
1 cup buttermilk

Preheat the oven to 350 degrees.
Grease and flour a 9 x 13 baking pan with Crisco.
Simmer the chopped prunes in hot water for ten minutes. Drain well.

In a medium bowl combine the dry ingredients.

With an electric mixer, beat the Crisco, sugar and eggs.

Slowly add the flour and buttermilk.

Gently fold in the prunes.

Bake for 30 minutes. As soon as the top is golden and the sides begin to pull away from the pan it is done. Do not rely on a toothpick for this or you will run the risk of over-baking the cake. And nobody wants a dry cake.

Frosting
1/4 cup strong coffee
½ box of confectioners sugar
2 TBLS butter
Walnuts, whole

After the cake has cooled, whip the sugar and butter with an electric mixer. Add coffee to taste. Frost the cake and carefully place walnuts to cover the cake, evenly spaced. Mom breaks out the tape measure for this step. Do make sure you pick the prettiest, most in tact walnuts. It does make a difference.

November 21, 2010

Frozen burrito month

It’s 4:24 pm and darkness has already begun to fall. Chilly afternoons turned nights, preceded by stark, grey skies and cutting winds, it looks and feels like November- the pause before the colors of the holidays and the sounds of Christmas music. 


Time speeds up during these short, grey days and it takes a decided effort not to resort to pre-packaged meals that require defrosting on a daily basis. With deadlines and finals and Tom and mine’s ever shifting Google calendars (our half-hearted attempt to assemble some order), I admit that I’ve been woefully tempted to make November our official Frozen Burrito Month.  Then I remember that I didn’t even know what a burrito was until college and that the only form of frozen food I ever consumed as a child was French bread pizza, prepared by the occasional Friday night babysitter. Shamefaced, I return the burritos to the freezer and go to my short list of no fuss recipes.  Topping the list? Italian hamburgers.


Italian Hamburgers

If you were to ask me if I’ve ever had meatloaf, I’d shake my head, scrunch up my face in a displeased expression and say, “nope”. My mother never made such things. Until recently, I didn’t realize that the below recipe was actually an Italian rip off of the American comfort food classic. A rip off? Perhaps. An improvement? Most definitely.

As is often the case, the below measurements are approximations at best. The consistency should not be too dry, think of these as really large meatballs. Dijon mustard and peppers in sauce are good accompaniments to this quick, satisfying meal.


Makes 4 servings
1lb ground meat
¾ cup Italian flavored breadcrumbs
1/3 cup Parmigiano-Reggiano cheese, grated
½ onion, chopped
1 egg
3 good sized garlic cloves, minced
Hot pepper flakes
Oregano
Salt
Pepper

In a large bowl combine meat, breadcrumbs, cheese, onion, garlic and egg. Using your hands, mix thoroughly and add hot pepper, oregano, salt and pepper to taste.

Form hamburger patties. Place on a broiling pan covered with tinfoil.

Broil on high until golden and crisp, flip and cook the other side.

October 31, 2010

Just in time

I blinked and October all but disappeared. It came in one colorful burst of activity leaving as abruptly as it entered. Starting tomorrow it’s going to be November and I’m so not ready for it to be November.   Although the fact that my freezer is filled to capacity with roasted tomatoes, hot pepper paste, pesto, applesauce and eggplant caponata suggests that perhaps I’m more prepared for grey November skies than I thought. Knowing that I can now conjure the aromas of a warm September afternoon by simply defrosting some pesto makes the whirlwind that was October ever so worth it. Still, the final push to get these lovely tastes of early autumn frozen in time has left me feeling breathless and even a bit dazed.

I’m particularly excited about the eggplant caponata. Tangy with a slight sweetness, pungent and just a little crunchy this is one dish that leaves your taste buds singing. I’ve never met an eggplant that I didn’t want to take home to turn into something special.


It is surprising then, that a few weeks ago was the first I had heard of Great Grandma Tocco’s eggplant caponata. But hear about it I did, (from my mother who made it without me!) and I raced to find a couple of eggplants that hadn’t yet been exposed to the cold New England frost. 


I made it just in time to bid a cheerful farewell to October has she made her hasty exit.

Sicilian Eggplant Caponata
Adopted from Mamma Mia Italian Cookbook: The Home Book of Italian Cooking


2 large eggplants, cubed
1 TBLS salt
¾ cup good quality olive oil
2 onions, chopped
1 can plum tomatoes, drained
A generous ½ cup green olives, pitted and roughly chopped
3 celery stalks, diced
¼ cup capers
¼ cup red wine vinegar
2 TBLS sugar
Salt and pepper to taste

Cube your eggplant, salt it and let stand for 2 hours. Squeeze dry with a towel.

Heat your oil and sautee the eggplant until golden brown. Remove from pot with slotted spoon.

Add onions to the oil and let soften for about 10 minutes.

Add tomatoes, olives and celery and sauté for another 15 minutes.

Return eggplant to the pot and add the capers.

In a separate pot heat the vinegar, add the sugar and let it dissolve.

Pour the warm vinegar over the eggplant and vegetables, cover and cook slowly for 20 minutes over medium heat.

Serve warm with a crusty loaf of bread.

October 10, 2010

Suitcases and Sausages

May I have your attention please? Nonna has arrived. With frozen sausages, ricotta, homemade cannoli shells and oregano all packed in her suitcase (I’m serious); she has been flown in to cook for that annual party I’ve told you about. More importantly, she’s here to spend some quality family time with the Kostecki’s.

Yesterday we bundled her up against the crisp autumn weather, and despite the small craft warning we put her into the boat and we all enjoyed the New England coastline.  The afternoon ended with steamers and lobsters in celebration of my dad’s birthday.

Today Tom and I spent the afternoon preparing our little apartment for Nonna’s inspection. I even ironed the linens. Honestly that was more for my mom’s benefit than Nonna’s- last time my mom came to visit and my tablecloth was wrinkled she got out my iron and did it herself. 

And there won’t be time for ironing during this visit. I have to bring Nonna to my neighborhood farmer’s market so that she can have a word with my veal guy and taste the cheese stand’s homemade ricotta to see if I have finally found ricotta in Massachusetts that warrants Nonna’s approval. There’s a reason she gets on a plane with frozen ricotta and sausages from Detroit.  They’re just better there. 

So, I bet you think that I’m now going to give you a recipe for Italian sausages right? Sorry. This week I had such success roaming the farmer’s market in search for the leafiest, greenest vegetables available that I just have to share with you a different family favorite: Fried cauliflower.  


I don’t think too many people are used to eating cauliflower this way, but I strongly encourage you to try it.  If you get a really leafy one such as the one seen above you could try sautéing the greens with some olive oil and garlic and serving them over penne with Parmesan cheese and hot pepper flakes. That’s what my Grandma Chinni would do.

Fried Cauliflower


I never realized how significant cauliflower is to the Italian diet. Throughout my childhood my mom would make this dish during the fall and winter seasons but I always just assumed it was a random recipe that she had stumbled upon. Come to find out that this in fact a Nonna recipe and that cauliflower is a prominent player in Italian cuisine.

1 head of cauliflower cut into into florets
Corn oil
Flour
Salt and pepper to taste

Par-boil the cauliflower florets until just fork tender. Maybe five minutes.

Heat up the corn oil so it covers the surface of your non-stick pan.

Salt and pepper your flour. Douse the par-boiled cauliflower with the flour.

Gently place in the pan and fry until golden and crisp. Sprinkle with kosher salt and enjoy!

September 28, 2010

A Perfect Cookie in a Not So Perfect World

We all have our faults and idiosyncrasies, which at least in our family make for some rather rambunctious holiday gatherings.  No one is perfect, no one is always right; our flaws (and in our case, the Sicilian Temper) are what make us who we are. But Nonna sees her job as assuring each and every one of us that we are perfect, flawless and should be proud (albeit acutely aware) of our Sicilian blood.  This is all fine and well, although my guess is we shouldn’t always take her encouragement to heart. We are not perfect.

Case in point- Three years ago, much to my utter dismay and humiliation, I developed a food sensitivity to nuts which included a full out allergy to sesame seeds. I had become one of “those” people. As you can imagine, with all of the almonds, pine nuts and *sigh* sesame seeds that are involved with Italian cooking it was difficult to come out to my family- especially Nonna. I had no desire to be judged for what I viewed as an unwelcome character flaw. What kind of Italian is unable to enjoy nuts? But Nonna, bless her heart, did not judge. She (as she does for everyone) went to work accommodating my newly acquired limitation. Because of her efforts I am still able to enjoy most of the family staples, but there is one recipe in particular that is no longer an option for me. It breaks my heart to abstain from the following, as it is quite possibly the world’s most perfect cookie.

The Sesame Cookie (aka The Death Cookie)


It’s everything a cookie ought to be- not too sweet, pleasingly nutty and dense with flavor, the perfect accompaniment to a strong cup of coffee or as Nonna might suggest for a particularly hard one, dunked in wine.


These cookies were made by both of my great grandmothers and were considered the “every day” cookie. Grandma Chinni had several renditions of this recipe including substituting anise seed for the sesames and taking them out of the oven half way through baking to brush egg yolk on them.  When last my mom made these cookies she crushed some crystallized rock candy and used the sugar as the sesame substitute for my cookies. She, like Nonna, is a great Mom.

4 cups flour

1 cup sugar

1 TBLS baking powder

¼ tsp salt

1 cup lard
2 tsp vanilla 

2 eggs slightly beat
½ cup whole milk warmed (Note: you may not need this much depending on the consistency of the dough)

Egg whites slightly beat

Sesame seeds

In your mixing bowl combine flour, sugar, baking powder and salt. Using the mixing paddle attachment add the lard, vanilla and eggs. Begin adding the milk a tablespoon at a time. You may not need to use all of the mild because you do not want super sticky dough.

Gather the dough into a lump and let set for about 10 minutes or so. Wrapped in plastic wrap, let it sit in the fridge for at least 30 minutes.

Preheat oven to 375*

Using your hands, roll dough into oversized almond shapes. Brush with egg whites and roll in sesame seeds. 

These cookies need to be baked for at least 15 minutes until the bottoms are light brown.

Storing Note:

 After baking let the cookies sit out in a bowl for a day or so. Sesame cookies freeze beautifully but if you wish to enjoy them over the course of a couple of days remember to leave them uncovered otherwise they will go soggy and become less fantastic with each passing moment.

September 10, 2010

No Apologies

Fall is here and I have to tell you that I am thrilled. I’m so excited for crisp winds, cool mornings, and light sweaters that it doesn’t even bother me that somehow summer slipped by me this year. Truthfully, I’m happy to see it go. Goodbye smothering heat waves and glaring sunshine that doesn’t even have the decency to have a cheerful demeanor. Hello cider donuts, colorful mums and chilly nights- you have been missed.

As you may have noticed (ahem), I spent my summer doing quite a bit of cooking and not so much blogging. I won’t apologize though, because my culinary adventures have been well worth it. There was a failed yet courageous attempt at gnocchi that I don’t wish to discuss and a flavor blunder with some fried zucchini blossoms that is better left alone. But let me say this, our roasted turkey on spit more than made up for either of these mishaps.


In July, I successfully baked two tarts with the help of a dear friend. Well okay, there was more watching than actual baking on my part, because let’s face it I don’t seem to have the appropriate temperament to handle pastry dough, but still it was a gallant effort. And at the time I really did mean to share it with you… I’ve just been so busy with crab bakes, grilled corn, homemade barbeque sauce, raviolis, stuffed eggplants, stuffed peppers, stuffed zucchini globes (yes there’s been much to stuff this summer), and perfecting the art of hot pepper paste that I simply ran out of time.


But I’m back now and am excited to share with you the fruit of my culinary efforts. I think you will find that the wait has been worthwhile. This next recipe is big and I hope you are ready for it. After several practice runs, and some one-on-one Nonna training this summer, I am delighted to share with you Nonna’s Veal.


It is impossible to put into words the love that goes into this dish and the flavor it brings out. Nonna’s fried veal doesn’t taste like the breadcrumbs it’s rolled in or the oil it’s fried in, it simply tastes like tender, delicate, oh-so-delicious veal.

Growing up in “The Valley” of western mass, I can assure you that I was the only kid amongst my group of friends who had a.) ever tried veal and b.) never been told there was anything wrong with eating veal. The fact that it was baby cow did not (and sure I’ll admit it, still doesn’t) bother me in the least.  When I got a little older and started asking questions my Nonna promised me that her veal comes from Canada where they treat the livestock much more humanely. I’ll be honest, I was sure she was making this up for my benefit. The first time I cooked veal this summer my butcher heard me jokingly say this to my friend. The lovely man interrupted and said, “Actually, your Nonna is right. The Canadians treat their veal much better and it tastes better too. That’s where we get our veal from”. 


The question remains then, does Nonna buy her veal from Canada because of the better treatment, or because of its superior taste? I haven’t asked her but I am sure of her answer: what does it matter? 

Nonna’s Veal

Nonna would advise against serving this as your main dish.  At the very least, make sure to also include pasta with the meal.


The veal is just so good that if you let them, people will eat a pound each, and as Nonna says, “this stuff is like pure gold”.

  • 1 ½ lbs sliced veal will yield enough for four people

  • 1 egg lightly beaten
  • 
Breadcrumbs, preferably homemade. Add fresh chopped parsley, salt, pepper and a small handful of Romano cheese to the crumbs.

  • Corn oil
Ok, first let’s talk about the cut of veal. You want to ask your butcher for the top leg round and to slice it not as thick as a cutlet, but not as thin as a scaloppini. Do not accidently purchase veal loin. The “better” cut will spoil everything. Do not let your butcher pound the meat.

Once at home, pound the meat out yourself, with a very light touch- this is delicate tissue we’re talking about!

Next blot the meat with paper towels. Veal holds a lot of water and needs to be dried in order to fry properly.

Dip the dried meat in egg; wipe off the excess egg; lightly pat both sides of the veal in the breadcrumbs.

Lay the breaded veal in a single layer on a baking sheet and refrigerate for at least 30 minutes.

Pour the oil in the frying pan- just enough to cover the bottom of the pan. Heat on medium high. You’re using corn oil rather than olive oil because it heats at a higher temperature and imposes less flavor onto the meat.

Once oil is heated, add the veal, turning once until lightly golden on each side.

July 3, 2010

The Tocco Bunch

In our family, the Fourth of July has always been an enthusiastic celebration. Growing up, my parents would pack us kids into the family minivan and we would proceed to drive twelve hours to Detroit, pick up Nonna, then drive another five hours to The Cottage- a humble establishment built by my Papa in the 1960’s and situated off of Wonderland Drive in Beulah Michigan, overlooking Platte Lake. 


We would spend the week with aunts, uncles, cousins, and people who were in no way related to us but I guess came with the lake, eating, swimming, canoeing, fighting, hugging and eating some more.  Often there was a pig roast, sometimes there was water skiing, and always there were fireworks of the “questionably legal” variety.

To this day, Nonna’s absolute favorite thing to do is to see how many of us she can fit under the same roof before the oxygen dissipates. In a three bedroom cottage. With exactly one shower and until recently no dishwasher. And I believe I’ve previously mentioned the political and religious divide that comes into play here- i.e. the Massachusetts bleeding hearts versus the Midwestern Bible belt. It’s the best.

But here’s the thing. None of that really matters when you’re ten years old and you get crispy pig on a stick, cousins to canoe with, an aunt who marches around with a baton and leads an imaginary 4th of July parade, an uncle whose southern connections gets him fireworks the Boston Pops WISHES they had, and a Nonna who will never be convinced that you’ve eaten enough.  I mean, with all of that who really needs two showers?


The last few years my family has spent the 4th alongside James Taylor at Tanglewood or with Keith Lockhart and the Boston Pops, because let’s face it we do love that dirty water. The reality is that life can’t always steer us down Wonderland Road for every Fourth of July, but that doesn’t make my childhood memories any less significant.

And rest assure, the Toccos are multiplying. Kids grow up, get married and have more kids. So no matter what, even if life is taking some of us to Newburyport, Massachusetts rather than Beulah, Michigan this July 4th, the cottage is never going to be less crowded or make fewer memories. There are just too many people in our crazy Italian family for that to ever happen.


Now getting back to that pig roast. When our family does a pig roast, we do it up right. My dad stays up all night with the fire pit (yes you do need a fire pit) so that the logs turn into coals. And then rain or shine the next day that sucker is basted with apple cider for hours and potatoes and onions are tossed in the pit to roast alongside. Yum.

Mom’s Pasta Salad


Being Italian, no meal is complete without some form of pasta. Enter Mom’s pasta salad. She’s been making this salad every summer for as long as anyone can remember and for good reason. It’s colorful, it’s flavorful and she even manages to get some fresh vegetables in there. Not an easy endeavor when all you can think about is pig.


3 medium carrots, small dice
2 cups of frozen peas
1 large red pepper
¼ cup olives, chopped (she uses black, but I prefer green)
1 lb orzo pasta cooked al dente, rinsed with cold water
¼ cup red onion, diced (optional)
1 habanero pepper diced (optional)
2 tsp Dijon mustard
3TBLS white balsamic vinegar
6 TBLS extra virgin olive oil
Salt and pepper to taste

Add the carrots, peas, red pepper and olives to the cooled pasta and toss.

Make the vinaigrette. In a small bowl add the mustard and vinegar and slow whisk in the olive oil until mixture is emulsified. Add salt and pepper to taste. 

Toss with vinaigrette with the pasta and vegetables.

If ready to serve add the onion and habanero pepper if desired. These ingredients overpower the dish if let to sit so if you are making this dish a day ahead, add them right before serving.

June 25, 2010

A "Family" Recipe

As a child, I always considered myself extremely lucky. My mom never, ever made me drink milk (citing the Mediterranean’s intolerance to dairy and her general dislike for the stuff), she never insisted we buy cafeteria lunch (THAT would have put the kybosh on my early-in-life appreciation for good food), instead I got to bring slices of Genoa salami and provolone or left over pasta from the night before. And growing up, there was always a particular item in my family’s kitchen that made me feel extra special- Jam. 


I did not know that you could buy jam in the grocery store until I was about five and my daycare provider tried to add a purple, gelatin-like substance onto my peanut butter sandwich, also known as “grape jelly”.  Shudder. As you might guess, this did not go over well.  I thought everybody’s freezer had endless jars of strawberry, raspberry, apricot, blueberry and blackberry jam. At five years old, the thought of a jam-less kitchen was mind-boggling.

All these years, watching my mom and Nonna spend summer afternoons cleaning and smashing berries I was under the distinct impression that homemade jam was a really big deal. Something that requires lots of love and attention and skill and uses a recipe most likely introduced by Great Grandpa Tocco who owned a produce truck.


A couple of weeks ago, my mother watched as the very first strawberry ripened in the Pioneer Valley.


Then she called me and we made plans to spend the day together making strawberry jam. I show up with my camera and notebook and announce that the jam making will have to wait until we get some better light in the kitchen. My mom looks at me, looks at the camera, looks at the notebook and throws up her hands exasperated, “Why do you want to blog about this? Can’t they just get recipe off the back of the box?”

Excuse me? All these years our family has been ripping the jam recipe off those stupid little yellow boxes of Sure-Jell? Seriously? But wait.  We must tweak it to make it better, no? Again my mom gives me an exasperated look. Surely Nonna must add her special touch the jam? Nope. I called Nonna and all she had to say about it was to be sure and cook the blueberry jam, otherwise it doesn’t taste like anything. And does she have a recipe for cooked blueberry jam? You bet. It can also be found ON THE BACK OF THE YELLOW BOX. Right. My mom, anxious to get started finally says, well you know, I don’t like to crush the strawberries as much as the box tells you to.


So there you go. I’m giving you a recipe that can be found on the back of the box of fruit pectin with exactly one modification: don’t over crush the strawberries.

Strawberry Jam
Courtesy of Mom, Nonna and the folks at Sure-Jell

When we celebrate the Fourth of July at Nonna’s Cottage, a huge tub, yes tub, of strawberry jam is issued at the beginning of the week and is slowly gone by Friday. No joke.  Even though it’s off the box, there’s still no getting around it. Jam, particularly strawberry jam simply tastes like a mouthful of summer.

3 or 4 jelly jars, washed
2 pt. strawberries rinsed, stems removed and halved
4 cups of sugar
1 box of pectin
¾ cups of water

Gently crush the strawberries using a potato masher (when all is said and done you still want to recognize them as strawberries).
Stir sugar into crushed berries, let stand for 10 minutes.
Stir pectin and water in a small saucepan; bring to a boil, stirring constantly. Let boil for 1 minute. Remove from heat.
Stir pectin mixture into fruit, stirring constantly until sugar is completely dissolved for 3 minutes.
Pour into jelly jars and let stand at room temperature for 24 hours.

June 5, 2010

Picnic Essential-This Week’s Pinch Hitter, Green Beans

You were supposed to read about chicken today. Not just any chicken. Believe me, this chicken was going to change your life. I was going to share with you chicken that is baked in the oven but comes out golden and crispy and could pass as the fried stuff, but oh so much better with breadcrumbs, butter and rosemary…

I was going to write about how it’s the perfect picnic food, because it tastes even better cold. And then I was going to tell you all about the lovely picnic that Tom and I enjoyed on the rocks of Halibut Point, eating our cold chicken, green bean & potato salad and these Mexican chocolate cookies. 


Then I discovered that none of my chicken pictures came out focused. Oh, I have lots of shots of the uncooked chicken, but really, how convincing would that have been?  This means that for today’s post, the green beans will be pinch hitting for the chicken, primarily because their pictures came out prettier and not unfocused.


I hope you’re not too disappointed. Really, they are just as flavorful and you can’t have oven fried chicken without these green beans. So at some point I was going to have to give you this recipe anyways.  I was just really, really excited about the chicken.

I suppose I can still tell you about the picnic. There were blankets, chairs, good books, wine, cheese and then of course cold chicken and green bean salad. When we picnic with my parents, my mom always brings some freshly cut flowers for the cooler-turned table (which is appropriately covered with colorful linen). 


Me, well I can never remember to bring the flowers. But, we did have the perfect rock, which gave us the perfect view of my beloved New England coast. It was a day worth sharing, with or without the chicken.

Green Bean and Potato Salad


1 lb. fresh green beans, stemmed and trimmed
¾ to 1 lb. small red potatoes, halved

½ red onion, sliced
2 plump garlic gloves, minced
4-5 TBLS red wine vinegar 

1 Tsp Dijon mustard

1 cup good quality olive oil
Salt and pepper to taste


Boil potatoes in salted water until tender about 10 minutes. Beware of overcooking; you do not want mushy potato salad. Drain and put into large bowl.

Boil green beans in salted water for 3-4 minutes until crisp and tender. Drain and set aside.

Now make the vinaigrette.  Combine the garlic, red wine vinegar and mustard into a small bowl. Slowly whisk in the olive oil to emulsify.  Salt and pepper to taste. At this point I usually end up adding more vinegar…I love vinegar.

Add the green beans and sliced red onion to the potatoes. Toss with vinaigrette and check for seasoning.

May 21, 2010

Happy Talk

My mom’s name is Ann Marie, and my name is Anina Marie. In Italian, “Anina” means “little Ann”.  It’s like my parents knew upon my birth that they had just cloned my mother.  I accepted at a very young age that if I hadn’t already, one day I would absolutely turn into my mother.  I was right. And guess what? I wouldn’t have it any other way.

Among the many qualities we share, one in particular drives the men in our lives crazy. We have the ability to watch the same movie over and over again, year after year.  We also like to categorize our movies, based on seasons. Some make perfect sense, for example White Christmas and Meet Me in St. Louis can be watched the day after Thanksgiving (over and over again) until January 1st. Others seem a little random. For instance My Fair Lady is definitely a February movie, Anne of Green Gables is a September-October movie, and Parent Trap (starring Hayley Mills and Hayley Mills) can be played anytime between Memorial and Labor Day. I have taken this categorization one step further. I have developed an interesting habit of pairing movies to what I’m cooking…  Sense and Sensibility is played when making soup, Sabrina when I’m baking. More on this curious practice later.

Another trait that I inherited from my mom is a zealous love of artichokes.  Given the opportunity, we could probably eat our combined weight in artichokes. We are that passionate about this vegetable.


During artichoke season, we make them lots of different ways. Sometimes braised, or poached, with lemon aioli or maybe some toasted breadcrumbs on the side for dipping. But our preferred preparation is Nonna’s Stuffed Artichokes. Hands down, it’s the best way to eat an artichoke. 


I get unbelievably excited around mid April when the purple and globe shaped artichokes start showing up in the produce section.  Not only does this mean artichoke season has sprung, it means it’s time for South Pacific. South Pacific is the perfect length for an afternoon of artichoke making.  It will carry you through the trimming, the soaking and the stuffing with time to pause for two replays of “Some Enchanted Evening”. Nothing makes me happier than stuffed artichokes and South Pacific.


Stuffed Artichokes


I got a little carried away a few weeks ago and decided to stuff the really big globe artichokes. This resulted in having to take out every pot I own to find one large enough to fit all three globes, which incidentally ended up being the largest stockpot I possess. Yes, they were that big.

I asked Nonna if Great Grandma Tocco ever made stuffed artichokes.  I mean the lady had twelve kids. Who on earth would try and cook twelve stuffed artichokes? Well, certainly not Great Grandma Tocco. She never made less than twenty-four.  To be fair, she did have two ovens to work with. But still. Twenty-four stuffed artichokes would definitely require a double feature.


Artichokes
2 lemons, halved
3-5 garlic gloves
Italian breadcrumbs
Extra virgin olive oil
Salt to taste

Fill a pot cold water. Squeeze two lemon halves into the water.

To trim the artichokes, begin with chopping off the stem as close to choke as you can so that the artichoke can stand up. Rub cut surface with lemon halve to prevent discoloration. Then, peal off the bottom outer leaves and any leaves that look tough or unhealthy. With scissors, trim 1/2 inch off the top of the remaining leaves. Again, rub cut surface with the lemon halve. Put both stem and artichoke into the bowl of lemon water. Let soak for 45 minutes to an hour.

In the meantime, season your bread crumbs with salt and pepper. Maybe throw in some grated Parmigian-Reggiano, some minced garlic or even some chopped anchovies for some real flavor.

Remove the artichokes from the water and proceed to fill the leaves with your bread crumb mixture. Place them back into the drained pot, along with the stems, so that they are standing up straight. If you need to, put some potatoes in between the artichokes to make sure everyone stays straight. Then at the end, you get artichokes and potatoes!

Drizzle the olive oil over the stuffed artichokes so that the mixture is moistened and won't fall out during the cooking process. Toss in the whole garlic cloves.

Submerge the artichokes in cold water, adding an additional few chugs of olive oil. Add a few pinches salt. Cover and cook on medium high until you can stick a fork through the stems and the leaves are starting to fall off, for at least an hour. Probably more, if like mine, your artichokes are on steroids. As the water cooks down, make sure you baste the artichokes every 20 minutes or so to ensure even cooking.